1965
Chrysler 300 Power Window Motor Installation
by Ron Klinczar
Sooner or later used parts have a
limit. Power window motors have been a nemesis for me in that way.
I had my front driver power window motor rebuilt by a long time
reputable small motor shop in my area, but there was an undetected
short in the motor and a lot of frustration for me as I wondered
where my wiring was messed up. In fact, the motor was.
A couple club members turned me on
to Dorman power window motors. On Dorman’s site and on the
phone, I confirmed they do not make a perfect fit motor for a 1965
Chrysler. But Dorman 742-301 (-300 for the passenger side) can be
made to fit for the 1965 regulator.It actually is listed for
Chrysler 1969-73 applications. Here is what I have learned in
installing this new power window motor on my 1965 300 2 Dr HT.
|
Removal:
After doing this
several times over the years, here are my tips for removing the motor
and regulator assembly.
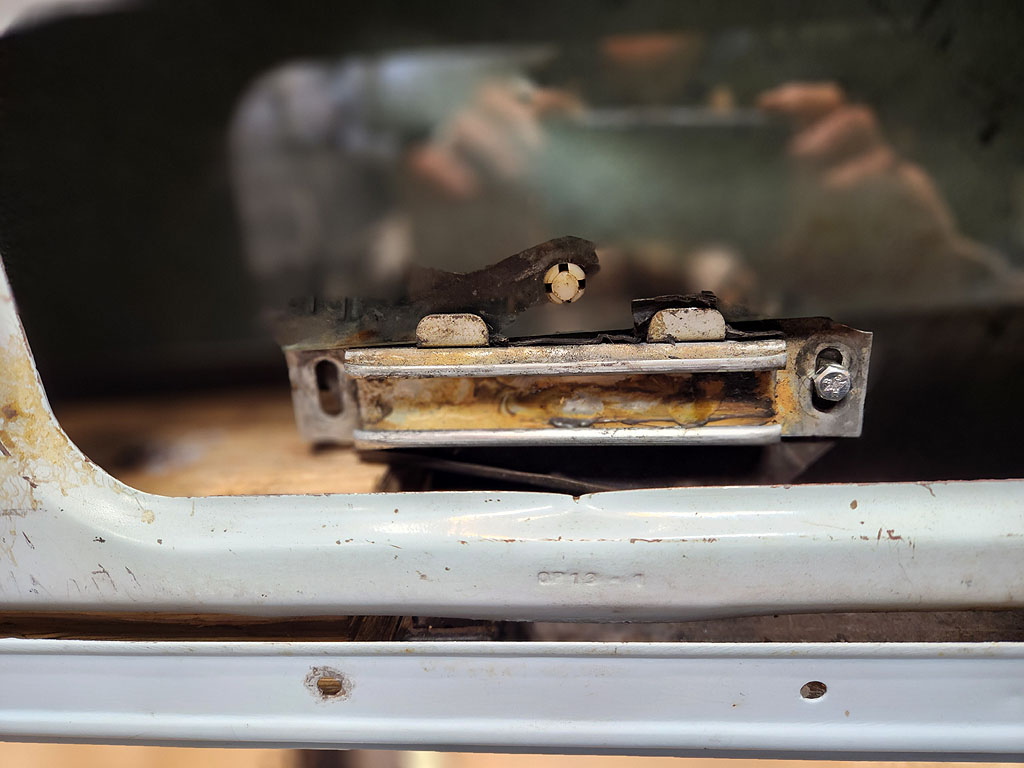
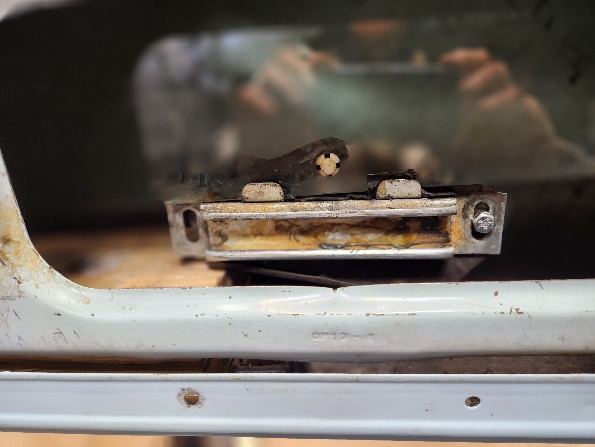
First, everything here is sharp, gloves are a
must. Lower window to 7/8 down (the Service Technical Manual says
all the way down). The lower window channel stop should be visible
and accessible through the large rectangular inner door panel cutout.
Remove the rear bolt of the lower window channel stop assembly and
loosen the front one.
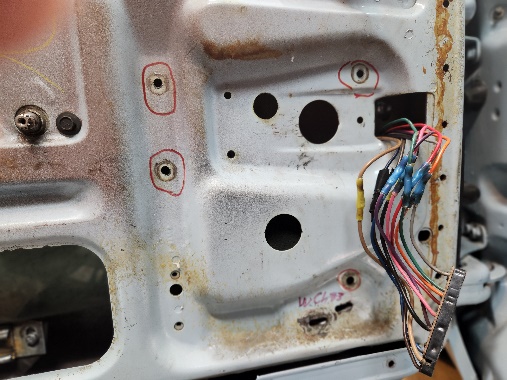
Shown in the second photo to the right, remove
the 3 bolts circled in red which hold the regulator to the door
frame. To remove the regulator and motor from the door frame, you
have to remove the lower bolt holding the Window Channel Frame
(labeled as W.Ch#3 at the bottom in the photo). That is the only way
you can slide the regulator and motor assembly up slightly and back,
to allow it to slide off the bottom channel stop assembly. Once the
regulator is off the assembly, the window glass needs to get out of
the way. Slide the window carefully up by hand and brace it in the
up position with a piece of wood 2x4 cut about 9-12” long and
placed in the back of the inside of the door panel vertically. Now
you can remove the electrical connector to the motor and slide the
regulator and motor out from the door frame.
|
|
|
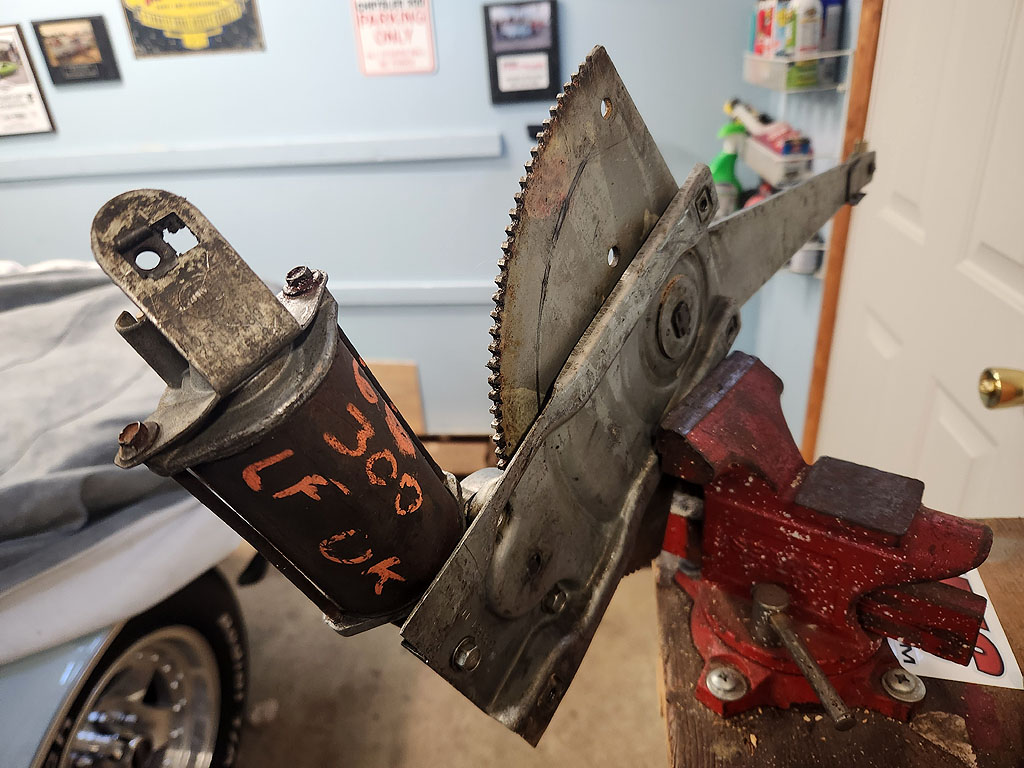
Anyone who has worked on these
regulator and door assemblies knows they are DANGEROUS if you remove
the motor from the regulator when not attached to the window. Use a
vise, see photo (others have suggested drilling a hole through both
parts of the regulator and securing with a bolt and nut). Clamp the
vise as tight as practical without bending the regulator frame. I
always stay away from the front of this powerful spring with my hands
and my face. Remove the 3 bolts holding the motor from the regulator
frame carefully, watching that there is no movement in the regulator
arm. The motor is off!
|

|
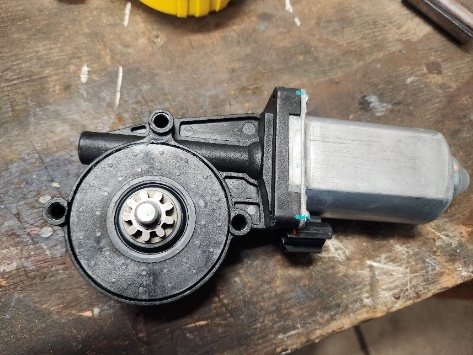
| About the Dorman -301 motor:
One of the reasons that this motor works is that the gear teeth are
the same as the ‘65 version and therefore matches the pitch of
the regulator sprocket. The OD of the gear is about ¾”,
there are 9 teeth per gear, and the teeth of the gear tend to be
nearly rectangular in shape.
|
|
|
There were no mounting bolts
included with the motor, so I needed to get them. I settled on
3-#10x24x1 ½” long stainless machine bolts with lock
nuts. This Dorman motor features a nylon bushing which I assume
will result in long term performance, but that bushing results in the
motor mounting faces being offset from the regulator face, in
comparison to the original motor. To accommodate the offset, I used
2 washers between the motor and the regulator frame, which seems to
be the perfect depth to close that gap. I verified that with the
washers in place that the gear aligns perfectly with the regulator
sprocket (see the washers in the photo). I used a dab of black RTV
to hold the washers in place during assembly. Finally, I used some
red grease on the regulator teeth to allow for long term operation.
Bear in mind all this occurs while the unit is on the vice.
|
|
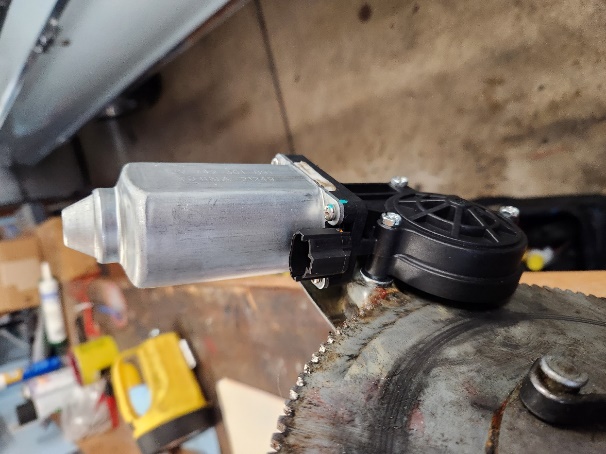
The Dorman motor comes with 3 sets
of electrical connector assemblies. I recognize one of them as
being 1970‘s Chrysler, where the two prongs are perpendicular
to each other nearly forming a “T”. But for 1965 none
of the connectors work, so I was forced to cut one of the connectors
and splice it to my supply wiring. (Original 1965 power window
motors have the connection point right at the motor, which was a
source of corrosion and motor failure. For 1966 and beyond wiring is
brought outside the motor and the connection occurs at a separate
external connection).
Installation:
I have found
that pre-installation is the best time to see that your window is
operating properly within its channels. The Service Manual
identifies locations of adjusting bolts. Trial and error has proven
to me that if you cannot pull the window up from the top of the frame
easily with two gloved hands, then the assembly is not adjusted
right. It should not stick at any point. Do this check right after
you insert the regulator and motor into the door frame, but before
connecting the unit to the frame.
When reinstalling the regulator
assembly, slide the regulator arm onto the bottom channel stop
assembly, and insert the bolt and nut that hold the roller in place.
Here I have a second wood 2x4 piece cut to a length to allow the
window to be held at 7/8 down position. Then work to get one of the
regulator bolts installed, being careful not to pinch the wiring.
Once that occurs you can raise or lower the window from below with
your one arm while you align the other two regulator bolt holes.
After, reinstall and tighten the window channel frame lower bolt that
needed to be removed. Double check to be sure the new wiring does
not interfere with window operation.
|